A Microsoft SQL database consists of at least two files, a data file (.mdf) and a transaction log file (.ldf). The data file contains all the data for the database, as you would expect. The transaction log file contains a record of every transaction against the database, since the last transaction log backup. All changes in the database are first saved to the transaction log, before being updated in the main data file.
The transaction log file can allow a database administrator to recover a database back to a specific point in time, rather than simply back to the last full backup. If you find there was some sort of database corruption at 4:30pm, you could recover the database back to 4:29pm using the transaction log file.
It is generally good practice to store the data and log files on different physical drives, or different raid arrays, providing both speed advantages, and protection from hard drive crashes. Keep in mind not to use RAID 0. While RAID0 provides some speed advantages, it provides no redundancy in the event of a drive failure.
The transaction log file can be backed up independently of the main database backup if required.
If you want to be able to take full advantage of transaction logging, you will need set the recovery model option for the database to “Full”. You could also have the recovery model set to “Bulk-Logged”, however any bulk operations will not be logged. If the database is set to “Simple”, you can only recovery from a previous full backup.
For production environments, it is recommented to use the “Full” recovery model.
Ever wanted to know what stored procedures exist on a database, but don’t have access to the SQL managment tools? The script below will produce a list of all the stored procedures on the current database.
SELECT Name AS StoredProcedureName
FROM sys.objects
WHERE type='P'
The Microsoft SQL Browser Service is a service that runs on a machine that has Microsoft SQL Server installed, and provides information to clients about the SQL server instances installed on the PC.
When you are connecting an application to a SQL server, generally the software has the capabilities to send a broadcast query out onto the network, and detect what SQL servers are available. This is generally presented to the end user with a drop down box listing all the SQL services, and the instance names. This broadcast query doesn’t communicate to the actual SQL Server directly, but it communicates with the SQL Browser service. This means that if the SQL Browser service is stopped, no client software will be able to automatically determine that there is a SQL server running.
With Microsoft SQL Server you can install a number of independent SQL Servers on a machine, and differentiate them with “instance names”. If you only want one SQL server installed, you can either set up an instance name, or use no instance name, which will be known as the “default instance”. With SQL 2008 R2, there is a limit of 50 instances per computer.
Each instance is completely separated, and databases set up on the individual instances. This can allow you to separate payroll database with tighter security, run multiple versions of SQL server, have a production and development SQL server, etc.
Since there can me many SQL instances running on the one computer, there needs to be a way to separate them at a network level. Each instance will run on its own unique TCP/IP port number. This is where the SQL Browser service comes into play. The SQL Browser service is queried before each initial SQL server connection, and can determine what instance name you are trying to connect to. It passes back to the client the port number that the specific SQL instance is listening on. If the SQL Browser service is stopped, you will no longer be able to connect to any SQL server instances (apart from perhaps the default instance if your lucky).
The SQL Browser service listens for incoming SQL queries on UDP port 1434. You must make sure this port, and also the TCP port that all your SQL instances are using, are allowed through any firewalls that might be in place on the machine running the SQL server.
Windows 2008 Server has a tendency to block these ports by default, so it can cause a few issues if your not aware of it.
Even if the SQL Browser service is stopped, it doesn’t prevent users from connecting to it, as long as you know the server name, instance name, and port number.
To connect directly to a SQL server instance running on a specific port, you would use the following format:
SERVERNAME\INSTANCENAME,PORTNUMBER
eg:
SQLSVR3\DEVELOPMENT,15032
This will bypass the SQL Browser service query, and connect directly to the SQL server called “SQLSVR3” with an instance name of “DEVELOPMENT” which is running on TCP port 15032.
For more information, check out the Microsoft article on the subject at http://msdn.microsoft.com/en-us/library/ms181087.aspx
If you need information on setting up SQL to listen on TCP instead of just Named Pipes, please check out my guide on Enabling TCP/IP in Microsoft SQL Server 2005.
Connecting to the Windows Internal Database (MICROSOFT##SSEE)
January 5, 2012 Database, Microsoft SQLIf you are running a Windows 2008 server, you may come across a service called the Windows Internal Database (Sometimes referred to as “SQL Server Embedded Edition”, or see a reference to a database called MICROSOFT##SSEE and be wondering what it actually is, and how can you connect to it. This “how to” article describes both.
The Windows Internal Database is a varient of Microsoft SQL Server Express 2005, and is included with Windows Server 2008 and Windows Server 2008 R2. It is also included in Windows Sharepoint 3.0 and Windows Server Update Services (WSUS) 3.0, where a full version of Microsoft SQL Server may not be available. Other services can also use this database engine if needed, such as Active Directory Rights Managements Services, and Windows System Resource Manager. Once the Windows Internal Database has been installed, it can’t be uninstalled via the “add/remove features” wizard (it appears greyed out, so you can’t de-select it).
Windows Internal Database currently only comes as a 32bit application, and if installed on a 64bit operating system, it will be installed under “C:\Program Files (x86)\Microsoft SQL Server” by default.
The tool used to connect to the Windows Internal Database is the same as used for the full version (and express editions) of Microsoft SQL Server, which is the SQL Server Management Studio (or SQL Server Management Studio Express). The main thing to note with the Windows Internal Database, is the fact that you cant make remote connections to the database. It is designed so that only the computer that has it installed, can access the databases. As such, the only connection method you can use to connect to a Windows Internal Database, is to use the Named Pipes protocol. When connecting to a Windows Internal Database, you must used the fairly obscure named pipes syntax, which will be listed below, as the server/instance name in SQL Server Management Studio.
The server/instance name to connect to is:
\\.\pipe\MSSQL$MICROSOFT##SSEE\sql\query
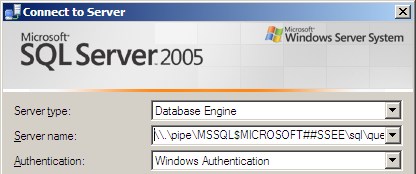
You must also use “Windows Authentication” as the authentication method to connect to this database.
If you get the following message stating that you “cannot connect to \\.\pipe\MSSQL$MICROSOFT##SSEE\sql\query”, continue reading for a possible solution.

One of the main issues you will have with connecting to the Windows Internal Database, is with authenticating. You generally need to connect to the database instance using the same windows login that was used to install the database service. If you have logged into the Windows server as an administrator, you may find that you need to run the SQL Server Management Studio application by first right clicking the shortcut, and selecting “Run as Administrator”. Even if your account has admin rights on the server, it still may be necessary to perform this step.
You should now be able to make changes to the databases options, perform backups, etc.
If you are installing Microsoft SQL Server 2005 onto a Windows XP machine, you may find that you get an error 1603 when it comes time for the MSXML 6 components to get installed. It has been found that this issue is caused by installing Windows XP Service Pack 3, on a machine that already has a specific MSXML 6 update installed. The fix for this is to run a MSXML 6 fix that is provided by Microsoft, and outlined in the howto below.
This bug can cause issues with applications that automatically install Microsoft SQL Server 2005 Express Edition as part of the applications installation process. These usually install SQL Server using an automated installation script, so it doesn’t pop up asking the end user for additional installation details that they may not be familiar with (eg. database passwords, instance names, etc). It may error out, and not give a good error message back to the user. In these cases, the only way to determine the exact error may be to look at the installation logs for SQL.
If you see the error message below, there is a good change that this matches the issue you are having. Ignore the other lines with red crosses. They failed automatically because MSXML 6 failed).
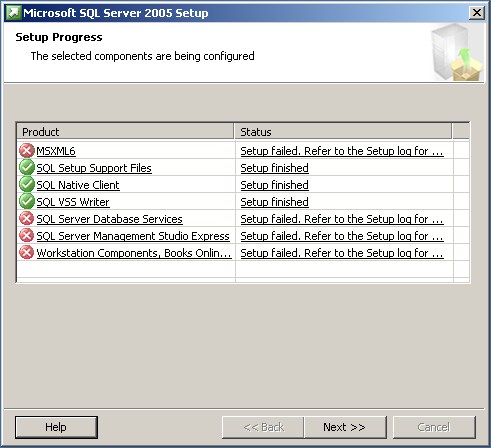
When clicking on the MSXML installation status, it will open a text file in notepad. Scroll down to the bottom, and you should see something similar to this:

Note where it says the error return code of 1603. This means that MSXML 6 can’t be installed, as it is already installed.
You may also get an error message pop up containing the following:
“Installation of MSXML 6 Service Pack 2 (KB954459) failed because a higher version already exists on the machine. To proceed, uninstall the higher version and then run MSXML 6 Service Pack 2 (KB954459) Setup again”.
The fix for this is located on the Microsoft site, at http://support.microsoft.com/kb/968749.
Go to the page, and scroll down to the bottom where it says “Let me fix it myself”, and download the fix file in step one.
or download it from the link here: http://download.microsoft.com/download/E/3/F/E3F51FFB-505D-480E-9F67-0DD3A9680DEE/MSXMLFix.EXE
Run the program once the download has completed.
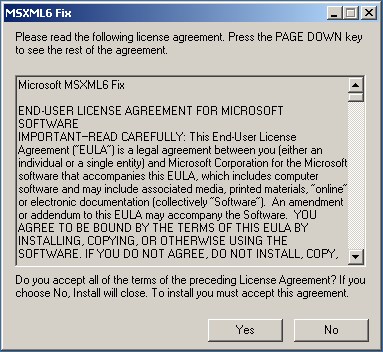
You will be greeted with a license agreement. Click ‘Yes’ to continue.
The next screen asks you where you would like to extract the files to. It will default to your temporary folder, but you can change it to any folder you wish to use.
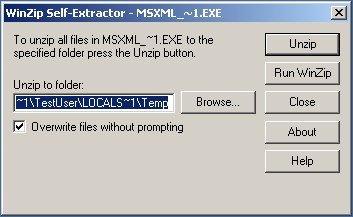
Click ‘Unzip’ to proceed with extracting the fix files.
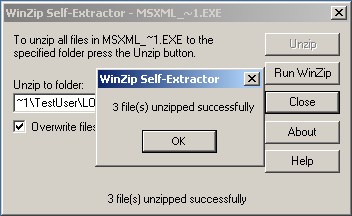
You will get a message stating that the files have been extracted.
Click ‘OK’.
This will take you back to the extract window.
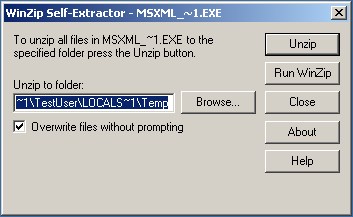
Take note of the folder the files have been extracted to. Copy it to the clipboard to make life easier when running the fix.
Open ‘My Computer’ or Windows Explorer, and browse through to where you extracted the files.
To make it easier, paste the folder path in the address bar, and hit enter.

There may be a large number of files in this folder if you selected to go with the default temp folder.
Look for the files named msxml6 and msxml_fix. (msxml6.msi and msxml_fix.vbs if you have your settings to show file extensions).
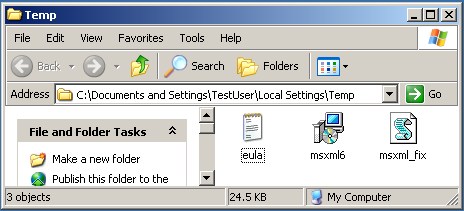
Double click on the msxml_fix file.

It may take a second or two to run, but you should get the following message appearing (it will vary depending on the OS version).
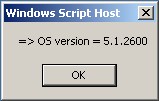
Press ‘OK’.

Press ‘OK’.
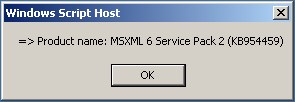
Press ‘OK’.
![]()
This is the command that the script is going to run in the background.
Press ‘OK’.
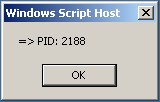
Press ‘OK’.
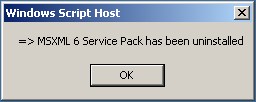
Press ‘OK’.
MSXML 6 SP2 has now been removed from the system.
You can continue installing Microsoft SQL Server 2005 again, and you should now progress through successfully, and get the following result.
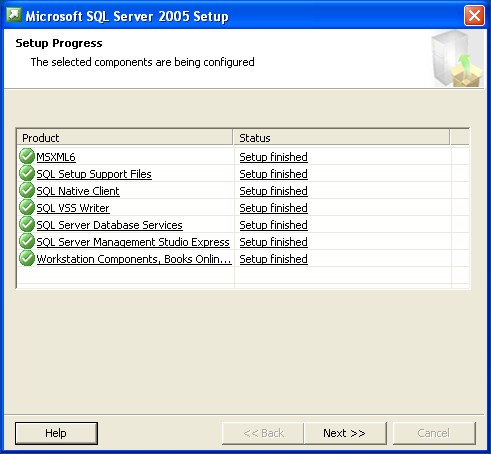
Microsoft SQL Server 2005 should now be installed correctly, with no errors.
For help setting up any other aspects of SQL Server, please visit my other howto guides.
When Microsoft SQL Server 2005 is first installed, you may find that by default the TCP/IP connection protocol is disabled. This was introduced with SQL Server 2005 to try and prevent future worms & virus from spreading around the internet on vulnerable systems. While this is a good thing, if the server is behind a firewall, and will never need to be accessed from the internet, you will find that having TCP/IP disabled may prevent some applications from connecting to the server correctly. The steps outlined below will guide you through enabling the TCP/IP protocol in Microsoft SQL Server 2005.
After installing SQL Server 2005, you will have a “SQL Server Configuration Manager” application in the start menu under the group “Microsoft SQL Server 2005”, and then the subgroup “Configuration Tools”. Open this application, and expand the “SQL Server 2005 Network Configuration”.
Underneath the network configuration section, it will list all instances of SQL Server 2005 that have been installed on the PC/Server. Select the relevant SQL server instance (Example: “Protocols for SQLEXPRESS” when using MS SQL 2005 Express installed as the default instance).
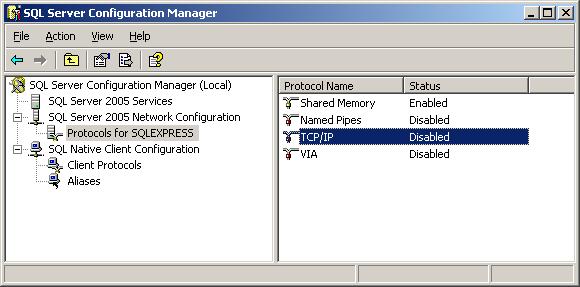
On the right hand side of the window will list all the available network protocols. Check to see if the TCP/IP protocol is currently enabled already. If its disabled, simply right click on the TCP/IP protocol name, and select “Enable”.
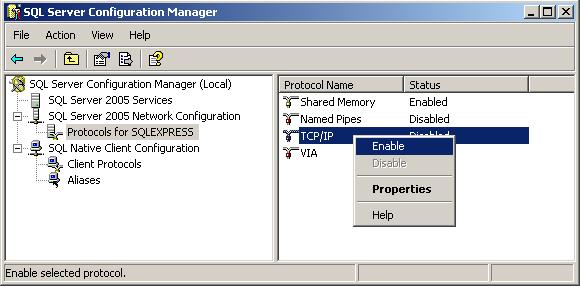
This setting change requires that the SQL Server service be restarted. It will warn you that you need to restart it.

You must now restart the SQL Server service. Click on the “SQL Server 2005 Services” option on the left hand side of the window.
Find the SQL Server instance that you changed the settings for, and right click on it.
Select the “Restart” option.
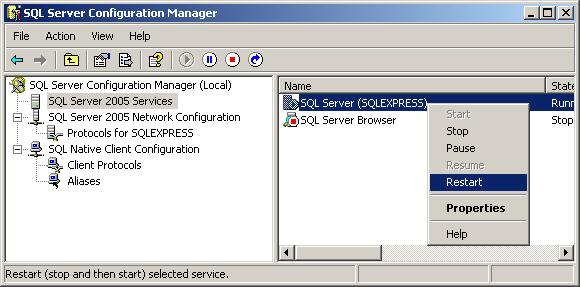
The SQL Server service will now restart, and you you TCP/IP should now be enabled.
If you still have troubles connecting to the SQL Server from a another computer, you will probably need to check for firewalls blocking TCP/IP access, and confirm your SQL authentication options.
Make sure to restart the SQL Browser Service after enabling TCP/IP or changing any network setting under SQL server. For more information on what the SQL Browser service does, check out my other guide: What is the Microsoft SQL Browser Service.
Ever wanted to know what triggers exist on a database? The script below will produce a list of all the triggers on the current database, and also what table they are linked to.
SELECT Name AS TriggerName,
OBJECT_NAME(parent_object_id) AS TableName
FROM sys.objects
WHERE type='TR'

