If you are installing Microsoft SQL Server 2005 onto a Windows XP machine, you may find that you get an error 1603 when it comes time for the MSXML 6 components to get installed. It has been found that this issue is caused by installing Windows XP Service Pack 3, on a machine that already has a specific MSXML 6 update installed. The fix for this is to run a MSXML 6 fix that is provided by Microsoft, and outlined in the howto below.
This bug can cause issues with applications that automatically install Microsoft SQL Server 2005 Express Edition as part of the applications installation process. These usually install SQL Server using an automated installation script, so it doesn’t pop up asking the end user for additional installation details that they may not be familiar with (eg. database passwords, instance names, etc). It may error out, and not give a good error message back to the user. In these cases, the only way to determine the exact error may be to look at the installation logs for SQL.
If you see the error message below, there is a good change that this matches the issue you are having. Ignore the other lines with red crosses. They failed automatically because MSXML 6 failed).
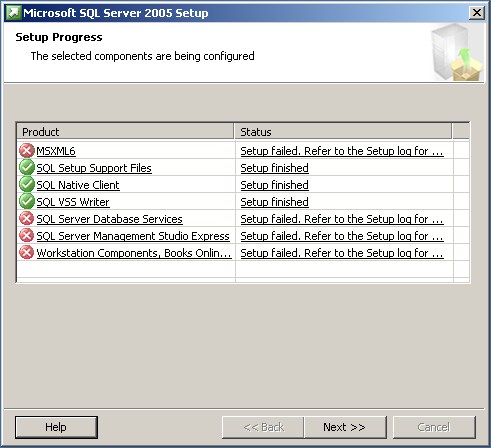
When clicking on the MSXML installation status, it will open a text file in notepad. Scroll down to the bottom, and you should see something similar to this:

Note where it says the error return code of 1603. This means that MSXML 6 can’t be installed, as it is already installed.
You may also get an error message pop up containing the following:
“Installation of MSXML 6 Service Pack 2 (KB954459) failed because a higher version already exists on the machine. To proceed, uninstall the higher version and then run MSXML 6 Service Pack 2 (KB954459) Setup again”.
The fix for this is located on the Microsoft site, at http://support.microsoft.com/kb/968749.
Go to the page, and scroll down to the bottom where it says “Let me fix it myself”, and download the fix file in step one.
or download it from the link here: http://download.microsoft.com/download/E/3/F/E3F51FFB-505D-480E-9F67-0DD3A9680DEE/MSXMLFix.EXE
Run the program once the download has completed.
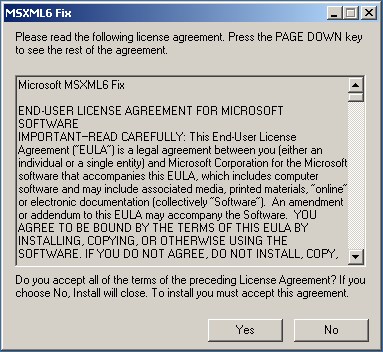
You will be greeted with a license agreement. Click ‘Yes’ to continue.
The next screen asks you where you would like to extract the files to. It will default to your temporary folder, but you can change it to any folder you wish to use.
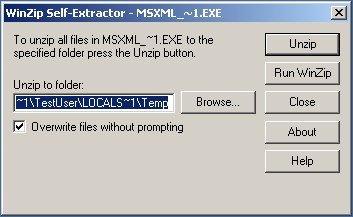
Click ‘Unzip’ to proceed with extracting the fix files.
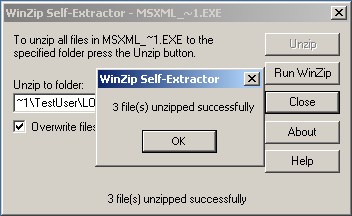
You will get a message stating that the files have been extracted.
Click ‘OK’.
This will take you back to the extract window.
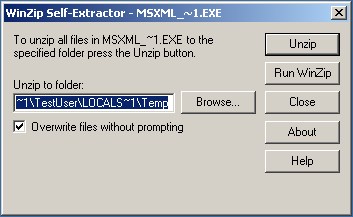
Take note of the folder the files have been extracted to. Copy it to the clipboard to make life easier when running the fix.
Open ‘My Computer’ or Windows Explorer, and browse through to where you extracted the files.
To make it easier, paste the folder path in the address bar, and hit enter.

There may be a large number of files in this folder if you selected to go with the default temp folder.
Look for the files named msxml6 and msxml_fix. (msxml6.msi and msxml_fix.vbs if you have your settings to show file extensions).
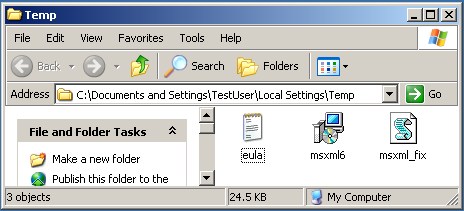
Double click on the msxml_fix file.

It may take a second or two to run, but you should get the following message appearing (it will vary depending on the OS version).
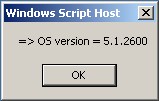
Press ‘OK’.

Press ‘OK’.
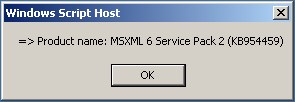
Press ‘OK’.
![]()
This is the command that the script is going to run in the background.
Press ‘OK’.
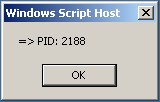
Press ‘OK’.
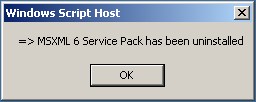
Press ‘OK’.
MSXML 6 SP2 has now been removed from the system.
You can continue installing Microsoft SQL Server 2005 again, and you should now progress through successfully, and get the following result.
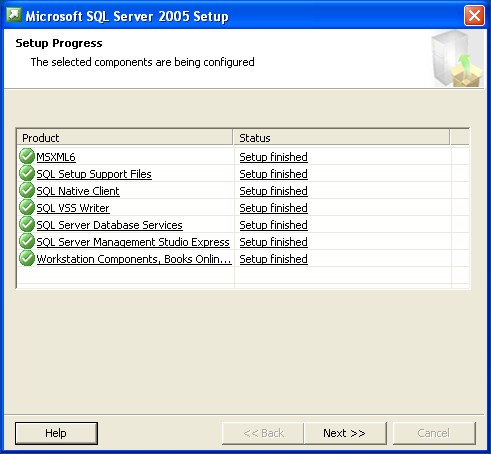
Microsoft SQL Server 2005 should now be installed correctly, with no errors.
For help setting up any other aspects of SQL Server, please visit my other howto guides.
When Microsoft SQL Server 2005 is first installed, you may find that by default the TCP/IP connection protocol is disabled. This was introduced with SQL Server 2005 to try and prevent future worms & virus from spreading around the internet on vulnerable systems. While this is a good thing, if the server is behind a firewall, and will never need to be accessed from the internet, you will find that having TCP/IP disabled may prevent some applications from connecting to the server correctly. The steps outlined below will guide you through enabling the TCP/IP protocol in Microsoft SQL Server 2005.
After installing SQL Server 2005, you will have a “SQL Server Configuration Manager” application in the start menu under the group “Microsoft SQL Server 2005”, and then the subgroup “Configuration Tools”. Open this application, and expand the “SQL Server 2005 Network Configuration”.
Underneath the network configuration section, it will list all instances of SQL Server 2005 that have been installed on the PC/Server. Select the relevant SQL server instance (Example: “Protocols for SQLEXPRESS” when using MS SQL 2005 Express installed as the default instance).
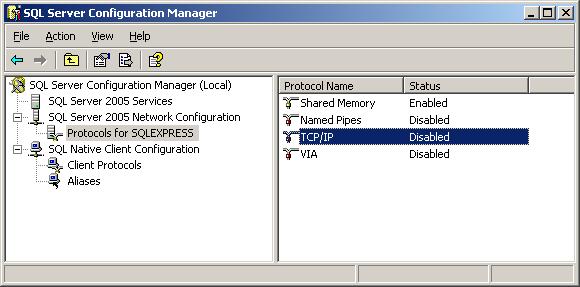
On the right hand side of the window will list all the available network protocols. Check to see if the TCP/IP protocol is currently enabled already. If its disabled, simply right click on the TCP/IP protocol name, and select “Enable”.
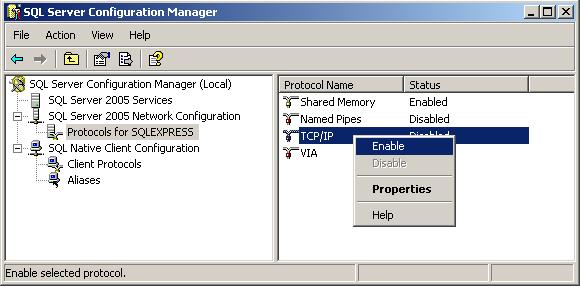
This setting change requires that the SQL Server service be restarted. It will warn you that you need to restart it.

You must now restart the SQL Server service. Click on the “SQL Server 2005 Services” option on the left hand side of the window.
Find the SQL Server instance that you changed the settings for, and right click on it.
Select the “Restart” option.
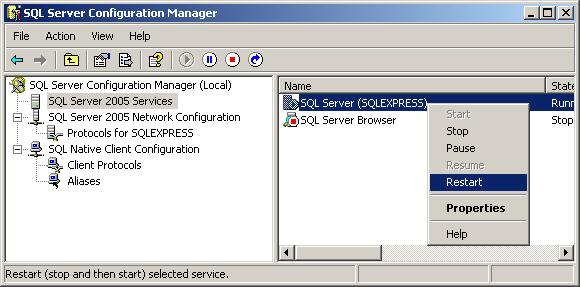
The SQL Server service will now restart, and you you TCP/IP should now be enabled.
If you still have troubles connecting to the SQL Server from a another computer, you will probably need to check for firewalls blocking TCP/IP access, and confirm your SQL authentication options.
Make sure to restart the SQL Browser Service after enabling TCP/IP or changing any network setting under SQL server. For more information on what the SQL Browser service does, check out my other guide: What is the Microsoft SQL Browser Service.

