This howto guide will step you through the process of setting up your Microsoft Exchange 2010 Server to send emails via a smart host.
The use of a smart host can be useful when the Exchange server cant directly send emails to external mail server. This might be due to firewall rules, ISP filters, or DNS issues.
Configuring Exchange 2010 to use a Smart Host when sending emails:
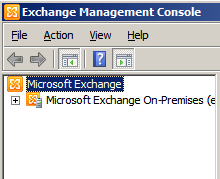
Open up the Exchange Management Console.

Once loaded, expand the options on the left hand side of the management console window.
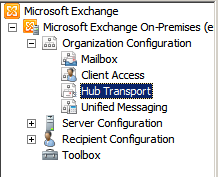
Expand “Organization Configuration” and select “Hub Transport”.
On the right hand side, you should see the hub transport options.
Click on the “Send Connectors” tab.

Right click your existing send connector, and select “Properties”.
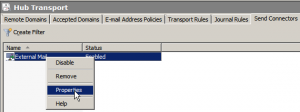
The send connectors properties window will pop up.
Click on the “Network” tab at the top of the properties window.
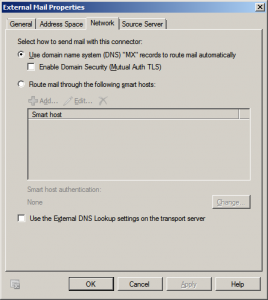
You have two options here for methods of sending emails. The first is to use the DNS system to route emails, and the second is to send emails via a smart host.
Select the “Route mail through the following smart hosts” option.

Once selected, the “Add” button and the Smart host listing section will become enabled.
Click “Add”.

The smart host screen should appear.
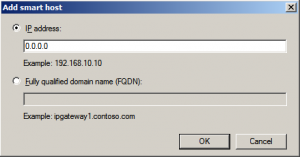
You can either specify the smart host address using the IP address:
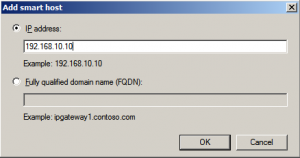
or via the fully qualified domain name:
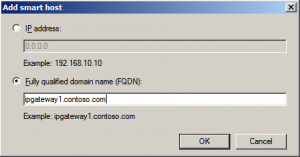
Once done, press “OK”.
This will take you back to the previous screen, and your newly added smart host should now appear in the Smart Host listing.
You can add more than one smart host if needed.
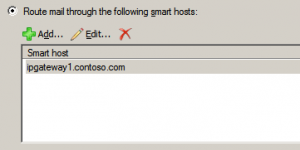
You will notice at the bottom, there is a authentication option, which by default is “None”. The authentication options apply to all the smart hosts listed. If your smart host server(s) requires authentication, click the “Change” button.
![]()
The following smart host authentication settings screen will appear.
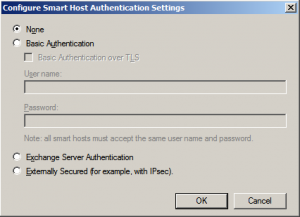
The two options that will generally be used are “None” and “Basic Authentication”.

Select “Basic Authentication” for the username and password fields to become enabled.
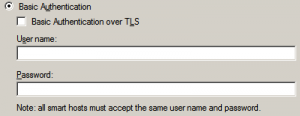
Enter in the username and password as required by your smart host server.
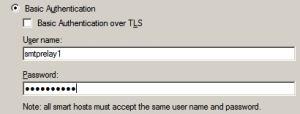
If your smart host server requires basic encryption over TLS, ensure the “Basic Authentication over TLS” tick box is ticked.
Click “OK” to go back to the send connector’s network configuration screen.
You can see that the authentication is now set to “Basic authentication”.
![]()
Click the “OK” button at the bottom of the send connector properties windows to apply the changes.
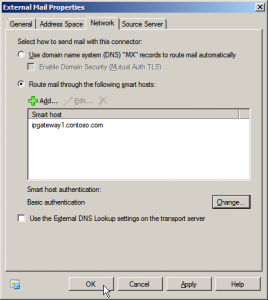
All outgoing emails that would go through that send connector will now go out via the specified smart host.
If you need to send the emails to the smart host on a port other than port 25, please read the following ‘how to’ article:
Change Exchange Smart Host Port Number
- 64 bit edition of Windows 2008 Server (if not using 2008 R2)
- You must have a copy of Exchange 2010.
This can be downloaded from:- Exchange 2010 with SP1 – http://www.microsoft.com/download/en/details.aspx?id=21570
or
- Exchange 2010 with SP2 – http://www.microsoft.com/download/en/details.aspx?id=28190
This guide outlines the installation for Exchange 2010 with SP1, but SP2 should be very similar, if not the same.
Both can be installed as trial copies, which last 120 days. If you want to continue using it after the 120 days, you will need to purchase a Exchange 2010 license. - Exchange 2010 with SP1 – http://www.microsoft.com/download/en/details.aspx?id=21570
- The server must be joined to a domain (or be the domain controller, however this is not Microsoft’s recommended approach).
- Microsoft .Net Framework 3.5
- Windows PowerShell v2
- Latest updates from Windows Update.
Installing Microsoft Exchange 2010 on Windows Server 2008 R2
April 11, 2012 Exchange Server, MicrosoftExchange Server 2010 is currently (at the time of writing) the latest version of Microsoft’s email server software. Its main features consists of email, calendaring, contacts, and tasks.
This how to article will outline the steps required to install Microsoft Exchange Server 2010 on a Windows Server 2008 R2 machine. The steps should remain the same for a standard Windows Server 2008 (64-bit required) machine, as long as it is up to date with all the latest updates.
Prerequisites
You need to ensure the following prerequisites are met before beginning the installation of Exchange 2010:
You may find that you need to install some additional updates when the installation does the readiness checks. It will tell you what its missing, and where to download the updates from.
For full details on what the requirements are, you can find more info at:
http://technet.microsoft.com/en-us/library/bb691354%28EXCHG.141%29.aspx
Installing Exchange 2010
Start the Exchange 2010 setup that you downloaded. The first time you run this, it will simply extract the setup files. You then need to go to the folder they were extracted to, and run the setup.exe file.
You should be presented with the following screen:
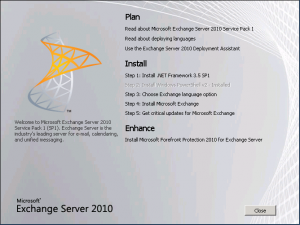
There will be 5 installation steps to go through as part of the installation. The main one being step 4, which is actually installing Exchange 2010.
If steps 1 or 2 aren’t greyed out, make sure you close the installer, and install the required programs.
Click Step 3, and select your language option. I used “Install only languages from the DVD”.
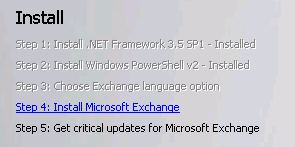
Click Step 4, and the Exchange 2010 installation will start.

The Exchange Server 2010 introduction screen should come up first.
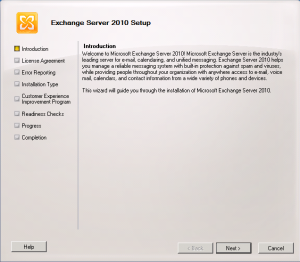
Simply click “Next” on this screen.
Next comes the license agreement. Read through this if you need to.
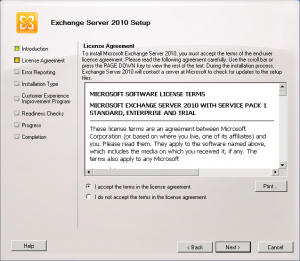
Select the “I Accept” option, and click the “Next” button to proceed with the installation.
You will now get a page inviting you to participate in sending error reports back to Microsoft.
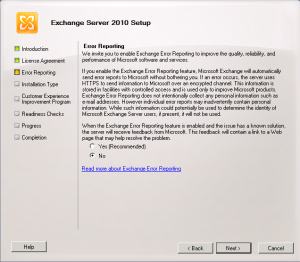
If you have no need to send/receive error reports, select the “No” option, and hit “Next”. If you would like to participate, by all means select “Yes” to this.
You should now be presented with the installation type options.
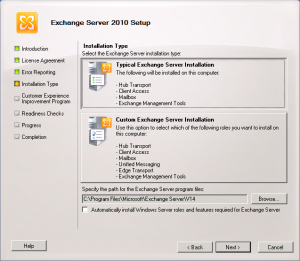
Exchange Server 2010 has a number of different roles. These can be split out onto multiple servers, or it can all be installed on the one server. For this guide, we are simply going with the “Typical Exchange Server Installation”, which installs every role required onto the one server.
Select the “Typical Exchange Server Installation” button so it is highlighted.
Change the installation path if you want to install it to a location that is not the default.
![]()
Also, tick the “Automatically install Windows Server roles and features required for Exchange Server” option. If you don’t have a required feature installed already, it will get installed automatically (For example, IIS).
Click “Next” after selecting the above options.
You will now be asked questions about the installation.
You must enter in a name for the Exchange organization.
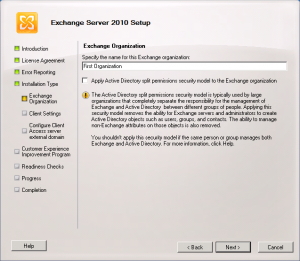
I will be leaving this as “First Organization”, but you can change it to be your company name if you wish.
Click the “Next” button to proceed to the “Client Settings” screen.
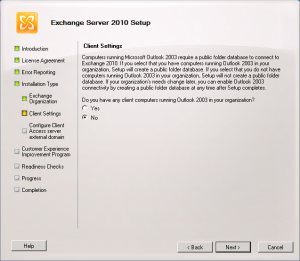
If you have any workstations that will be using Microsoft Outlook 2003 to connect to this server, you will need to select “Yes” on this page. Otherwise you can select “No”. Outlook 2003 requires a public folder database. Setting this to “Yes” simply creates the public folder database.
Click “Next” to continue to the “Configure Client Access server external domain” screen.
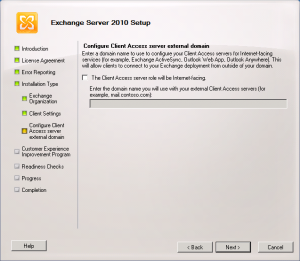
If you want to be able to connect into exchange from external sources (Outlook web app, Outlook anywhere, Exchange ActiveSync) you will need to tick the “The Client Access server role will be internet-facing.” option. The server can be behind a NAT router/firewall, but some port forwards would need to be set up for external clients to be able to connect in.
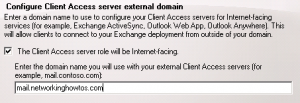
Enter in the domain name that will be used to access the server remotely. For this example, I am using “mail.networkinghowtos.com”. Make sure the domain name you select points back to your own server for things to work correctly. This domain name will get set for things such as the OWA External URL setting.
Click “Next” to continue.
You will now have a “Customer Experience Improvement Program” screen appear.
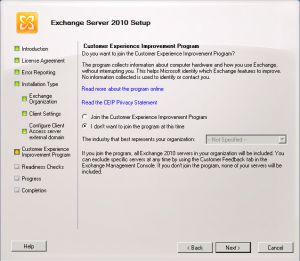
Have a read through this screen, and select the option that suits you. I chose “I don’t want to join the program at this time”.
Click “Next” to continue to the readiness checks.
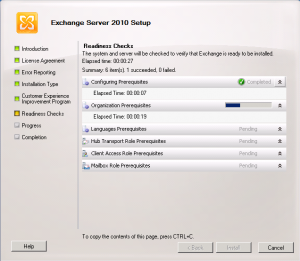
This step simply goes through and checks to make sure all prerequisites are correct before proceeding to actually install the Exchange 2010 package.
This may take a few minutes to go through.
You may find that you get errors or warnings during this process, as per the screenshot below.
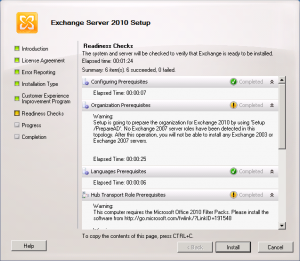
If you get any errors, the process will stop, and you will need to correct them before going any further. The errors generally have a link to a page on the Microsoft website explaining what the error is, and if a update is required, it will link to the update.
Warnings are just warnings, and you can still proceed with the installation. Its worth checking what the warnings are, just in case there is anything critical that you need to address before proceeding (eg. If you install Exchange 2010 on a domain, you cant install Exchange 2003 or Exchange 2007 on the domain at a later date).
Click “Install” to proceed with the installation of all the Exchange 2010 components/roles/tools/etc.
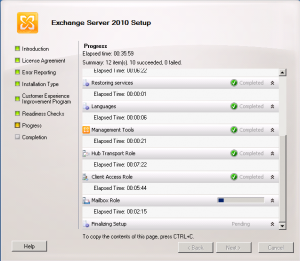
This process will take awhile, depending on the speed of the server.
Once that goes through, you should have all items with a green tick stating “Complete”, indicating that the items were installed successfully.
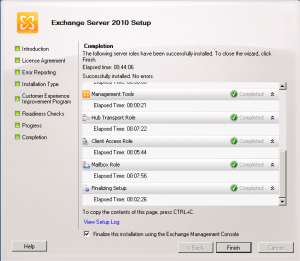
Click “Finish” to complete the Exchange Server 2010 installation.
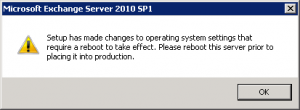
You will get a popup stating that you should reboot before the putting Exchange Server 2010 into production. Reboot the server when you get a chance.
Conclusion
You should now have Microsoft Exchange Server 2010 installed on your machine, ready to be configured further using the Exchange Management Console.
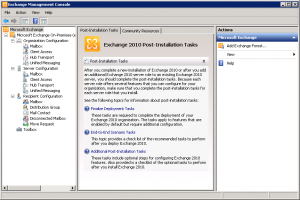
By default, the installation will be set up to handle emails between users on the Domain. You will need to configure Exchange 2010 further if you want emails to be sent/received using a real domain name over the internet.

