VMWare ESXi/vSphere 5 has the option to accept SSH connections to the server, to allow access to the file system of the server itself. By default SSH is disabled, and its not the easiest setting to find if you do need to enable it. This guide will show you how to enable the SSH server.
Load up the vSphere client, and connect to the ESX/ESXi/vSphere host machine you wish to enable SSH on.
Make sure the actual VMWare server machine is selected on the left hand listing.
Click on the “Configuration” tab.

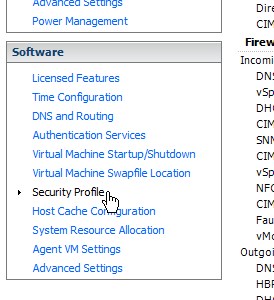
Click on “Security Profile” link from the “Software” section.

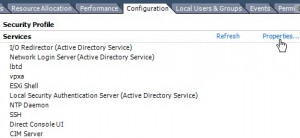
The right hand side of the screen should now display the security profile details.
Click on the “Properties” link located to the right of the “Services” title/section.

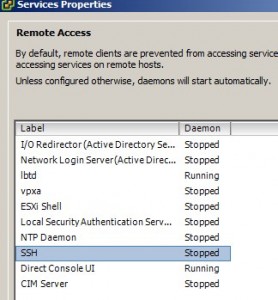
You will now see a list of services, and their running status.
You will notice that “SSH’ will be stopped.

Highlight the “SSH” service, and click the “Options” button.

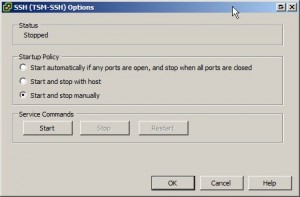
The window that will appear shows the service status, startup policy settings, and also allows you to stop and start the service.

Click the “Start” button in the “Service Commands” section to start the SSH server service.

Click “OK” to close the SSH options window.
Click “OK” to close the services properties window.
You should now be able to SSH into the VMWare server now.
To prevent any further SSH connections, follow the above steps, but click the “Stop” button to stop the SSH service.

