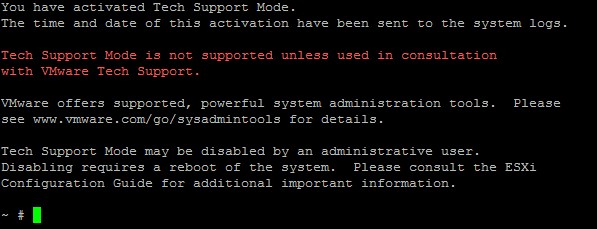
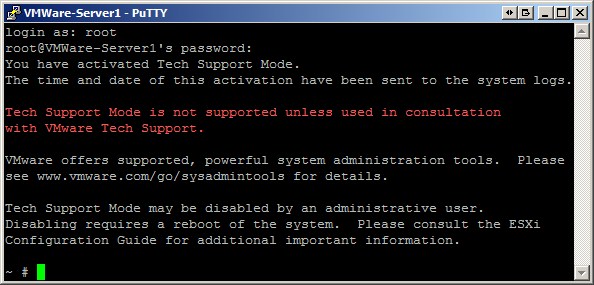
After installing VMware ESXi 4 (otherwise known as VMware vSphere), you will find that there doesn’t seem to be a method to actually get into the system, and edit any configuration files. All the configuration should be done via the VMware vSphere Client, vCenter, or another VMware utility, but sometimes there might be times where the only option is to get dirty, and edit configuration files manally. Thankfully ESXi/vSphere provides the ability to do it, however they call it “Tech Support Mode”, and as such, they make it known that the “Tech Support Mode” is not supported unless used in consultation with VMware tech support.
By default, the SSH service is disabled, so if you do end up needing to get access to the console (either with VMware tech support, or without), you must do it physically infront of the server. Im most cases where ESXi/vSphere will be being used, is in the data centre, and its not always easy to get physical access to the server, so this article will make it possible to connect in remotely.
Start by going to the physical ESXi/vSphere server. The screen should have the ESXi status screen on the monitor. From here, hold down the alt key on the keyboard, and press the F1 key. This will bring you to a virtual terminal. It should look like the following picture.
![]()
Anything you type on the keyboard here will not output on the screen.
Type “unsupported” and hit Enter. This will kick off the unsupported console session, and ask you for a password.

Again, you wont be able to see the password being typed in. Type the “root” password which would have been set by you, and hit Enter.
You will now be presented with a message from VMware about how this is a unsupported feature.

Once you have this console session going, its time to enable SSH access.
Type “vi /etc/inetd.conf” to open up the config file that we need to change.
![]()
Once the file opens, scroll down using pageup/page down, and the arrow keys, and find the line starting with “#ssh”. The “#” character at the start of this line means that it is simply a comment, and will be ignored.

Make sure the cursor is at the beginning of the first SSH line, and press the delete key to delete the “#” character. Only the first SSH line needs to be un-commented, unless you explicitly need access to the SSH server using IPv6.

To save the changes, type in “:wq” and hit enter. The command will display down the bottom of the screen as you type it.
![]()
Now that the configuration file has been modified, you will need to reboot the server for the changes to take effect. Simply type “reboot” and press enter.
![]()
After the system has rebooted, you should be able to use a SSH client, and remotely connect into the ESXi/vSphere host.

Please note that you will need to log in via SSH using the “root” username. The “unsupported” method only works from the physical console of the ESXi server.

