This ‘how to’ guide will step you through the process of installing FreeNAS 8 to a USB memory stick using a Windows computer.
This can be a handy too if you have a system that has crashed, and you just want to get it back up and running so you can copy files off of it. You can simply plug in a USB memory stick with FreeNAS installed to it, configure it to share out one or more of the drives, and access the data from the network.
You will need a USB memory stick that is 2GB in size or larger. This example is using the 64bit version of FreeNAS, however the same will apply to the 32bit version, as long as you update the file names in the examples to suit the 32bit file names.
Prerequisites:
– 2GB USB Memory stick (minimum).
– 7-Zip or another application that is capable of extracting .iso and .gz files. (Download from www.7-zip.org).
– physdiskwrite (Download from http://m0n0.ch/wall/physdiskwrite.php ).
Download FreeNAS 8
Download the FreeNAS 8 ISO:
FreeNAS 8.3.0 64bit
(Check www.freenas.org to obtain the latest version of FreeNAS)
Extract the FreeNAS 8 ISO
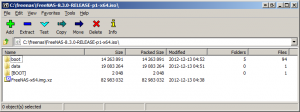
Open the FreeNAS 8 ISO file in 7-zip.

Double click the FreeNAS-x64.img.xz file:

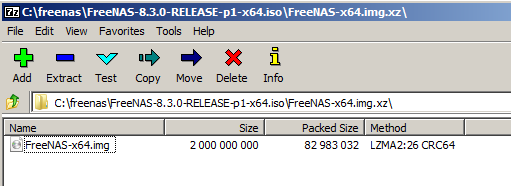
It should load this compressed image in 7-Zip:

Click the “Extract” button at the top.

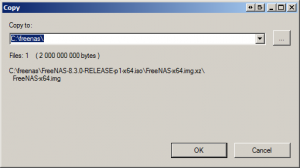
The extract windows should now appear.

Simply click “ok” on this window to extract the file to the folder your FreeNAS ISO was in. Change the output path if you want to store it somewhere else.

Close 7-Zip once the extract has completed.
Write the FreeNAS 8 Image to a USB memory stick:
Make sure you have downloaded physdiskwrite (link is in the prerequisites section at the top). Make sure this is extracted into the same folder as where you extracted the FreeNAS-x64.img file in the previous step. In our case, this will be “C:\freenas”.
Open a command prompt window.
If using Windows Vista, Windows 7, Windows 2008, Windows 8, or newer, open a command prompt window “as administrator”. Meaning, right click a shortcut for the command prompt, and select “Run as administrator”.
change the directory to where physdiskimage and the freenas image was extracted to. In my case “C:\Freenas”
cd c:\freenas
Run physdiskwrite to write the FreeNAS image file to your USB memory stick:
physdiskwrite.exe -u FreeNAS-x64.img
This will prompt you asking which device the FreeNAS image should be written to.
Example output:
c:\freenas>physdiskwrite.exe -u FreeNAS-x64.img
physdiskwrite v0.5.2 by Manuel Kasper
Searching for physical drives...
Information for \\.\PhysicalDrive0:
   Windows:       cyl: 484521
                  tpc: 16
                  spt: 63
   C/H/S:         16383/16/63
   Model:         VB0250EAVER
   Serial number: 8ZMF2PU3
   Firmware rev.: HPG0
Information for \\.\PhysicalDrive1:
DeviceIoControl() failed on \\.\PhysicalDrive1.
Information for \\.\PhysicalDrive2:
DeviceIoControl() failed on \\.\PhysicalDrive2.
Information for \\.\PhysicalDrive3:
DeviceIoControl() failed on \\.\PhysicalDrive3.
Information for \\.\PhysicalDrive4:
DeviceIoControl() failed on \\.\PhysicalDrive4.
Information for \\.\PhysicalDrive5:
   Windows:       cyl: 483
                  tpc: 255
                  spt: 63
Which disk do you want to write? (0..5)
In this case, my USB memory stick is PhysicalDrive5, so I entered “5” and hit enter.
You will be prompted for a confirmation. Enter “y” and press enter to confirm.
WARNING: that disk is larger than 2 GB! Make sure you're not accidentally
overwriting your primary hard disk! Proceeding on your own risk...
About to overwrite the contents of disk 5 with new data. Proceed? (y/n) y
It will now write the FreeNAS image file to the USB memory stick.
32636928/2000000000 bytes written
This will take a few minutes.
2000000000/2000000000 bytes written in total
c:\freenas>
Once its completed, FreeNAS will be installed on the USB memory stick.
Unplug the USB memory stick, and test it in another computer by booting off it. If all went well, it should boot into FreeNAS, and you can start configuring it.
You may need to change the boot order, or press the ‘boot menu’ button when the PC is booting to be able to boot off the USB device.


Thanks for this tutorial, helped me to install FreeNas to USB without using CDrom and unnecessary burning CD/DVD